Office Receipts
Modified on Thu, 23 Oct, 2025 at 1:52 AM
Guide Overview
Office Receipts can be processed directly from the Office Cash Account, from the Matter or from the Invoices screen.
TABLE OF CONTENTS
Processing Office Receipts
- Home menu > Create new (plus) button > Office Receipt
- Home menu > Banking Menu > Office Account > Receipt
- Dashboards > Accountant Dashboard > Office Account > Receipt
- Invoices > All Invoices > Tick invoice > Actions > Record Receipt


Recording an Office Receipt
1. Navigate to the Office Receipt via one of the above menus.
2. On the Receipt screen, the Received to Account field will pre-populate with the chosen cash account if you have recorded the receipt directly from the Office Account. Otherwise, select the relevant Office Account.

3. Start typing a name in the Received From field to select an entity from the directory. If the entity does not exist, a purple New symbol will appear to the right of the field and a note under the field will inform the user that an entity card will be created.
4. If the client has outstanding invoices in the system, the receipt will populate all the matters where there is an invoice outstanding to be paid.

5. In the Receipt Method field, select the method from the drop-down box for which the monies were received, an additional Receipt Method screen will appear.

6. Enter the relevant payment information and then select Save.

7. To view or amend the banking information at any point prior to posting the receipt, select the i to the left of the Payment Method field.

8. Enter the receipt Amount.

9. Select the Posting Date, which is the date the receipt is being recorded. The Original Date is the date the funds were received.

10. Enter a Reason or accept the default reason.

11. Enter an internal Memo if relevant.

12. Select the Add allocation button in the far right of the screen, to enter a Receipt Allocation. This is where the details of an invoice, an account or matter credits are entered.

13. In the Allocation line, under the Allocate To column, begin by typing in the relevant matter number, entity name, or invoice number to which the receipt relates.
14. Once selected, the Allocation Type, Description, Amount and Tax Code will pre-populate.

15. If more than one allocation for the receipt is required, select Add allocation again, to add a new line.
16. If the receipt is Tax Exclusive ensure to turn off the Tax Inclusive toggle.

17. The total will show in the bottom right of the screen.

18. Once all receipt information has been entered select Post or Post and New in the bottom right of the screen.

Issue a Receipt from the Matter, creating matter credit funds.
1. Navigate to the relevant Matter.
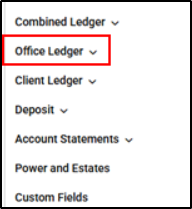
2. From the Matter Card select Office Ledger on the menu on the right hand side.

3. Select Post Receipt from the drop-down menu.

4. On the Receipt screen, if there is more than one cash account, select the relevant cash account from the drop-down menu in the Received to Account field.
5. The Received From field will be pre-populated with the client related to the matter.

6. Select the Receipt Method from the drop-down menu, a further screen will appear dependent on the Payment Method selection, complete the required fields and select Save.


7. Enter the Amount being deposited.

8. Amend the Posting Date and Original Date as required by typing or selecting from the calendar.

9. The Reason field will be pre-populated, but can be amended if needed.

10. Enter a Memo if relevant.

11. Once all receipt information has been entered select Post or Post and New.

Issue a receipt directly to a client invoice
1. Navigate to the Invoices screen.
2. Click on the Ellipsis to the right of the issued invoice you wish to receipt payment to.

3. Select Receipt Invoice from the drop-down menu.

4. On the Receipt screen, select the Received to Account from the drop-down list.

5. Confirm all of the pre-populated invoice details are correct.
6. Select a Receipt Method from the drop-down menu.

7. Enter the relevant information in the additional Receipt Method screen and select Save.

8. Amend the Posting Date and the Original Date where required by typing or selecting from the calendar.

9. Amend the Reason and enter a Memo if relevant.

11. Once all receipt information has been entered select Post or Post and New at the bottom of the screen

Filing Office Receipts
1. To file a receipt, click on Settings > Firm Settings from the top menu.

2. Then select Notification Preferences.

3. Select the arrow next to Matters to expand.

4. Navigate to Office Receipt Posted. Select File and click on Save.

Automatic filing of an office receipt is only possible where a receipt is allocated to a single matter.Was this article helpful?
That’s Great!
Thank you for your feedback
Sorry! We couldn't be helpful
Thank you for your feedback
Feedback sent
We appreciate your effort and will try to fix the article