Reversing Office Payments
Modified on Thu, 23 Oct, 2025 at 1:53 AM
Overview
This guide will go through the steps required to Reverse an office payment either directly from the Office Cash Account or from a Matter card.
There are two ways to access the Office Cash Account, Option 1 is via the Banking tab on the main navigation menu and Option 2 is via the Accountant Dashboard.
TABLE OF CONTENTS
How to Reverse an Office Payment from the Office Cash Account
How to access the Office Cash Account
Option 1: Banking Menu:
1. Select Banking from the main navigation menu bar, then select Office.
2. Select the relevant Office Cash Accounts by clicking on the name in the list.

Option 2: Accountant Dashboard
1. Select Home from the main navigation menu bar.

2. Use the My Dashboards drop-down to select the Accountant Dashboard.

3. Select the relevant Office Account from the Office Cash Accounts section.

How to reverse the Payment Transaction
1. Find and select the relevant payment transaction from the Cashbook Entries screen.

2. On the transaction screen click on the Reverse button in the bottom right of the screen.

3. When the Reverse Transaction pop-up screen opens the Reverse Date will default to the original posting date, but this can be amended by typing directly in the field or selecting a date using the calendar.

4. Amend the Reason if required.

5. Click on the Reverse button in the bottom right of the pop-up screen.

Reversing an Office Payment from a Matter
1. Navigate to the relevant Matter.
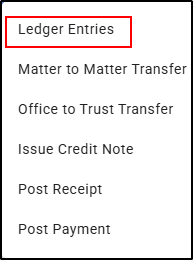
2. Select Office Ledger from the Menu on the right hand side.

3. Then select Ledger Entries from the drop-down menu.
4. Find the relevant Payment transaction and click on the Ledger icon to the right of the line to view the transaction details.

5. Within the transaction screen click on the Reverse button in the bottom right of the screen.

6. In the Reverse Transaction pop up screen, the Reversal Date will default to the original posting date but can be amended, by typing in the field or selecting a date using the calendar.

7. Amend the Reason if required.

8. Click Reverse in the bottom right of the Reverse Transaction pop up screen.

Was this article helpful?
That’s Great!
Thank you for your feedback
Sorry! We couldn't be helpful
Thank you for your feedback
Feedback sent
We appreciate your effort and will try to fix the article