Creating and editing an Invoice
Modified on Thu, 23 Oct, 2025 at 1:48 AM
Overview
This user guide provides a step by step instruction for undertaking the tasks involved in generating a singular client invoice in a single client matter. Creating invoices in bulk in multiple matters are covered in a further article.
This user guide is targeted to anyone in your firm who might be issuing invoices.
TABLE OF CONTENTS
How to create an invoice
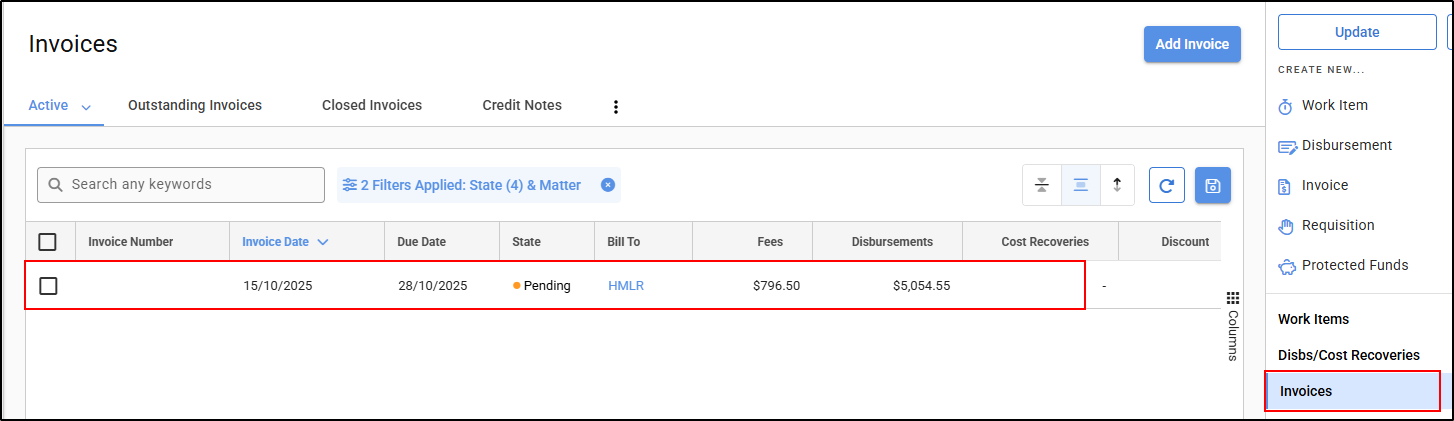
1. Open the Matter by one of the following methods:
- Using the Quick Search bar in the top menu.

- On your dashboard, under 'My Matters'.

- Select 'Matters' within the navigation menu then navigate to your matter.
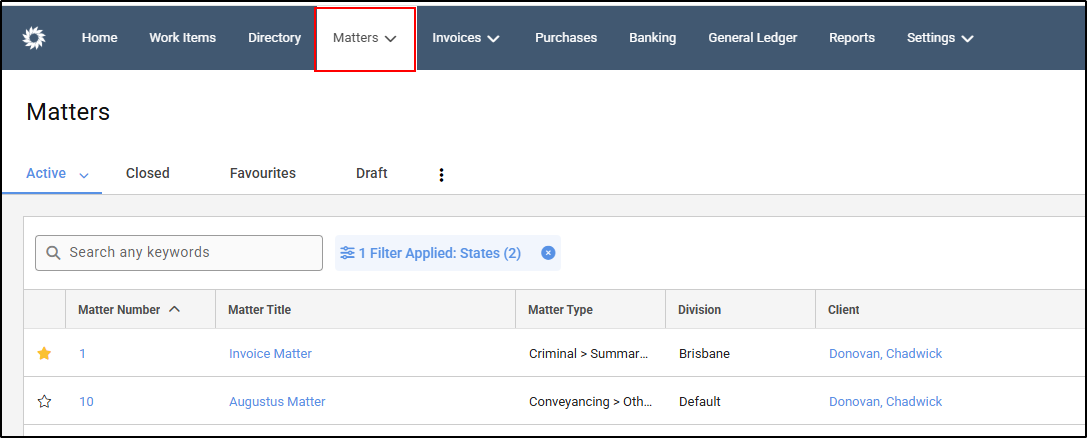
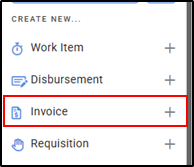
2. Select Invoices + from the matter card menu.
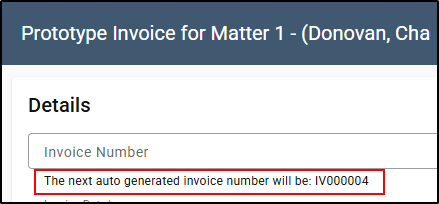
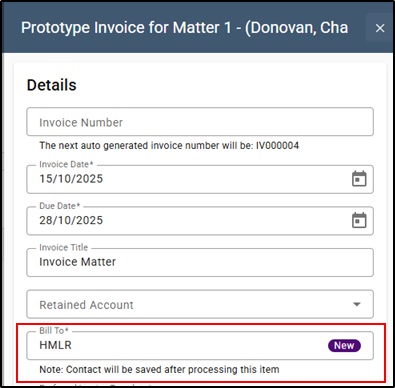
3. The Invoice Number will auto-generate when left blank.
4. On the Draft Invoice screen, confirm the Invoice Date. This field may be pre-populated based on your firm's settings.

5. Select the Due Date. This field may be pre-populated based on your firm's settings.

6. The Invoice Title will display the matter name by default, this can be deleted and free typed if required.

7. If Client/Trust funds will be used to pay the invoice, select the Retained Account to be used for retained Client/Trust funds.

8. If required, enter a retained Client/Trust amount.

9. The Bill To will default to the client of the matter. If the debtor should be adjusted, start typing a name in the Bill To field to select an entity from the directory. If the debtor does not exist, a purple New symbol will appear to the right of the field.
10. Select the Preferred Invoice Template. This will default based on your firm settings, or the default client/matter template.

11. Enter a Billing Address. This field may be pre-populated if an address has been entered for the entity or billing entity.

12. Enter a description in the Description field if necessary.

13. Review the Item Summary. The Invoice items can be amended from the invoice details screen.

14. Select Save. The Pending Invoice screen will open.

15. All billable items included in the draft bill will be displayed under the Invoice Items.
NOTE: For instructions on how to make various amendments, please read the applicable sections below.
16. On the Invoices page of the matter, select the Pending/ Draft Bill.
17. This Finalising an Invoice section is only applicable if your firm does NOT have a dedicated approval workflow. In that instance the invoice will be approved by the person selected in the workflow.
From the Actions drop down, select Finalise.

Invoice Edits
How to bill an item later
Billing an Item Later removes an item from an invoice and returns it to a state where it can be billed on a future invoice. This process does not write off or cancel the item, if you select to bill an item later then decide that it is not to be billed at all you will need to write off or delete the item.
1. To remove an item and set it to be billed later, select the tick box and click on the Actions drop down.

2. Select Bill Later.

The Revised column totals will display the value of the invoice once the selected items are removed.
How to Bill to Amount
Bill to Amount allows you to bill fees up to a value, and remove the remainder of the transactions from the draft to be available to bill later. The fees can be adjusted to match the total amount exactly. Work items are chronologically selected to reach the value, with any fee adjustments made simultaneously.
1. Tick the relevant line items or click on the Select button to select the fee items.
2. Select Actions - Bill To Amount.

3. Enter an amount or a percentage you wish to bill and select Preview.

4. The following screen will display fee entries included on the left and the items to be excluded/removed on the right. You can use the plus and minus signs to remove or add fee entries to the invoice.

5. Turn on the Auto Adjust Fees toggle to adjust the fees to the exact value.

6. Click Save.
How to group items
1. Tick the relevant lines to be grouped or click on the Select button.

2. Choose an individual fee earner's name, All Fees, All Disbursements, All Cost Recoveries or All Anticipated Disbursements.

3. Once the relevant lines have been selected to be grouped. Select the Actions drop down.

4. Select Group.

5. Once grouped, a concatenated description from the work items will appear, this description can be deleted and replaced by typing in a description.

6. A text template from work items narration can be used as the description for the grouped entries. Simply type in the text templates shortcut code in the description section and hit space bar on your key board and the narration will appear.

How to add a new work item
1. Select Add New.

2. Select Work Item.

3. On the New Work Item details screen, confirm the Entry Date, End Date and Employee.

4. Select the Task Type from the drop down list.


5. Select the Work Item Type from the drop down list.


6. Enter the Units.

7. Select a Rate

8. Check the Total.

9. Enter the work item narration.

10. Enter any Notes for the invoice

11. Select whether the item will be Billable then select Save.

How to add an unbilled work item
1. Select Add Unbilled. 
2. Select work Items or All to add all work items to the invoice.
3. Click on Select Unbilled to add individual unbilled work Items. 
4. The Work Items screen will open. Tick to select individual work items from the list and then click confirm Selection.
Adjusting, Discounting and Writing-off Items
There are three ways to adjust the items on your invoice:
- Adding a discount line adjusts the total of the invoice, adding a distinct discount line to the invoice. This will reduce the credit to your Revenue account to the new total and will also reflect the reduction against the fee earner's revenue in performance reports.
- Adjusting your fee items will reduce the selected line items by an amount or percentage. This will reduce the credit to your Revenue account to the new total and will also reflect the reduction against the fee earner's revenue in performance reports.
- Writing off an item reduces the item amount to zero. This will reduce the credit to Revenue in the general ledger and will reflect against the fee earner's revenue in performance reports.
How to add a discount line
1. Select Add New.

2. Select Discount Item.

3. A Discount heading will appear under Invoice Items, along with the new discount line.

4. Type in any text as the description for the discount item. A Discount Item Text Template shortcut can also be used as the narration. Simply type in shortcut code (for discount Text templates) and hit Space bar which will insert the narration. E.g. DIS for Discount as per signed Agreement


5. Enter the discount amount. 
How to adjust professional fees to a new amount
1. If a single entry is to be adjusted, select the tick box for the entry.

2. If a fee earner's timesheet entries are to be adjusted in its entirety or all professional fees for all fee earners are to be adjusted, click on the Select button.

Choose the individuals name or select All Fees.

3. Click on the Actions drop down.

4. Select Adjust.

5. Select if the new total for professional fees should be adjusted to an amount or by a discount percentage.

6. Enter the amount or percent and select Apply.

7. The adjustment will equally pro-rata across all fees selected. The line total will change to the adjusted value and the original total will display below.

How to write off a fee entry
1. To write off a fee entry, select the tick box and click on the Actions drop down.


2. Select Write Off.

3. Once written off, the entry will move to the Written Off section and the written off amount will appear at the bottom of the screen for clear visibility when approving and/or finalising an invoice.

Was this article helpful?
That’s Great!
Thank you for your feedback
Sorry! We couldn't be helpful
Thank you for your feedback
Feedback sent
We appreciate your effort and will try to fix the article