Create Disbursements and Cost Recoveries
Modified on Thu, 23 Oct, 2025 at 1:47 AM
Overview
There are four types of recoveries that can be entered on the disbursements tab of the matter. These are Cost Recovery, Anticipated, Incurred (Purchase), Incurred (Payment).
Cost Recoveries are a soft disbursements such as photocopying, scanning and printing to be recovered from the client.
Anticipated Disbursements are disbursements that are not yet incurred but can still be invoiced to the client. An example of this is a Barrister Fee which is not yet incurred and is only to be paid once the client has paid. It is anticipated on the matter until it has been assigned to a purchase invoice. It will not show on the office ledger until it has been assigned to a purchase invoice.
Incurred Purchase is a supplier invoice processed on a matter to be recovered from the client.
Incurred Payment is a bank payment processed on a matter to be recovered from the client.
TABLE OF CONTENTS
Cost Recoveries
A cost recovery can be created as follows:
1. Navigate to and open the Matter.
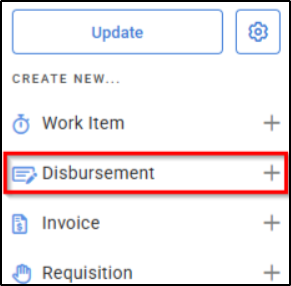
2. Select Disbursement from the Matter Actions menu.

3. To create a cost recovery using one of the Disbursement Codes, select the disbursement from the from the Disbursement Code drop down menu. Then Click Next.

4. Alternatively, select Cost Recovery from the menu options.

5. Enter a Description of the cost recovery.

6. Enter the number of units, rate per unit and select the relevant tax code from the Tax Code drop-down menu.

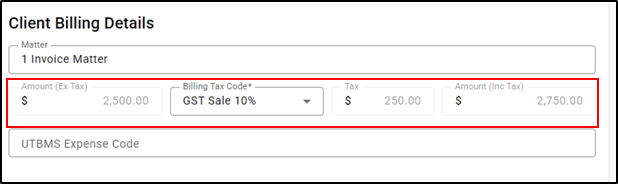
7. The Client Billing Details section will populate automatically, the Billing Tax Code can be adjusted if required.

8. Click Save.

Anticipated Disbursements
An Anticipated Disbursement can be created as follows:
1. Navigate to and open the Matter.
2. Select Disbursement from the Matter Actions menu.

3. To create an Anticipated Disbursement using one of the Disbursement Codes, select the disbursement from the from the Disbursement Code drop down menu. Then Click Next.

4. Alternatively, select Anticipated Disbursement from the menu options.

5. Enter details of the Anticipated disbursement in the Description field on the Disbursement Details section of the screen.

6. Start typing a name in the Pay To field to select an entity from the directory. If the supplier does not exist, a purple New symbol will appear to the right of the field and a note under the field will inform the user that an entity card will be created.

Note: When adding a new supplier during the processing of a transaction, additional address and payment details will need to be entered on the entity card and the newly created Supplier will be taken through a Supplier Verification process. This process allows Supplier banking information to be reviewed prior to any Payment being made to the supplier.
7. Type in an amount and choose a tax code from Tax Code drop-down menu.

8. The Client Billing Details section of the screen should be left as is, unless a different billing tax code is required.
9. Click Save.

Incurred (Purchase)
An Incurred (Purchase) can be created as follows:
1. Navigate to and open the Matter.
2. Select Disbursement from the Matter Actions menu.

3. To create an Incurred Purchase using one of the Disbursement Codes, select the disbursement from the from the Disbursement Code drop down menu. Then Click Next.

4. Alternatively, select Incurred Purchase from the menu.

5. Start typing a name in the Pay To field to select an entity from the directory. If the supplier does not exist, a purple New symbol will appear to the right of the field and a note under the field will inform the user that an entity card will be created.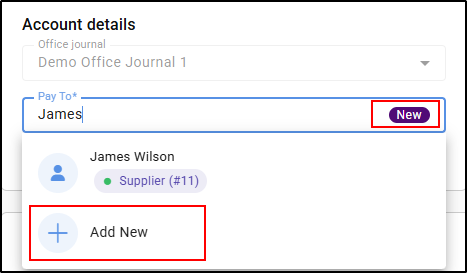
Note: When adding a new supplier during the processing of a transaction, additional address and payment details will need to be entered on the entity card and the newly created Supplier will be taken through a Supplier Verification process. This process allows Supplier banking information to be reviewed prior to any Payment being made to the supplier.
6. In the Purchase Details section Posting date, Invoice date and Due.

7. Enter an Invoice number and Invoice Description.

8. In the Purchase Allocations section of the screen, type in a corresponding amount and select a tax code. The amount can be marked as tax including using the Tax Inclusive toggle. Select a Billing Tax Code as required.

9. Click Attach Files in the top right of the screen.

10. Drag and Drop the file from a location on your desktop, into the box provided.
Note: Once a transaction is completed with an attachment present, you can later access the attached file by navigating to the relevant Office or Trust ledger, selecting the transaction and then selecting the Attachments heading.
11. Click Post at the bottom of the screen.

Incurred (Payment)
An Incurred (Payment) can be created as follows:
1. Navigate to and open the Matter.
2. Select Disbursement from the Matter Actions menu.
3. To create an Incurred Payment using one of the Disbursement Codes, select the disbursement from the from the Disbursement Code drop down menu. Then Click Next.

4. Alternatively, select Incurred (Payment) from the Menu.

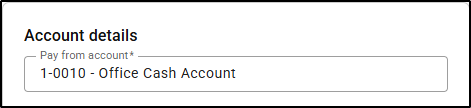
5. On the left-hand side of the screen, in the Pay From Account field, select which account you are paying from, from the list of options.
6. Start typing a name in the Pay To field to select an entity from the directory. If the supplier does not exist, a purple New symbol will appear to the right of the field and a note under the field will inform the user that an entity card will be created.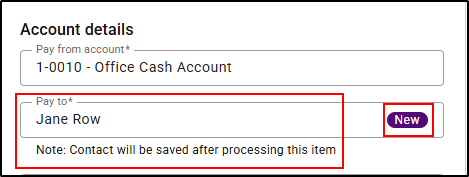
Note: When adding a new supplier during the processing of a transaction, additional address and payment details will need to be entered on the entity card and the newly created Supplier will be taken through a Supplier Verification process. This process allows Supplier banking information to be reviewed prior to any Payment being made to the supplier.
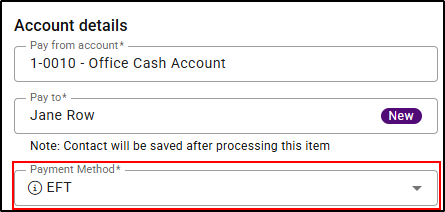
7. Select a payment method from the Payment Method drop-down menu. Depending on which payment method is selected, a new screen will open for completion of the details relating to that payment method.
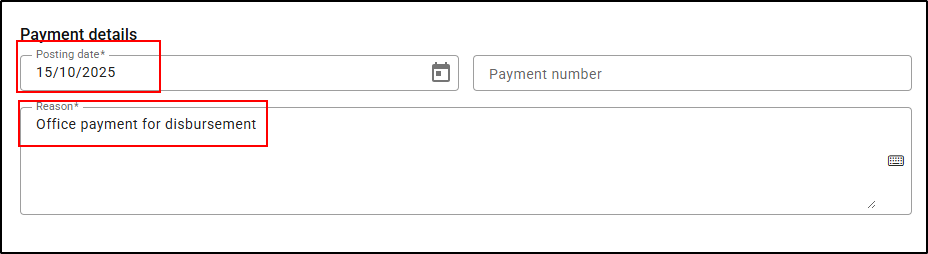
8. Select a posting date and enter a reason for payment.
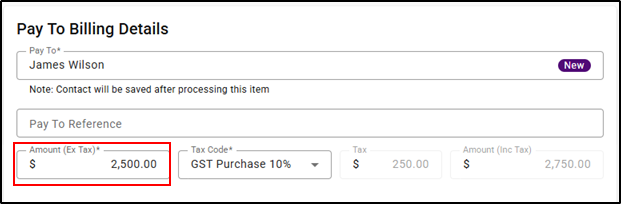
9. In the Payment Allocations section of the screen, type in a corresponding amount and select a Tax Code and Billing Tax Code. The amount can be marked as tax including using the Tax Inclusive toggle.

10. Click Attach Files in the top right of the screen. Alternatively, Drag and Drop the file from a location on your desktop, into the box provided.

Note: Once a transaction is completed with an attachment present, you can later access the attached file by navigating to the relevant Office or Trust ledger, selecting the transaction and then selecting the Attachments heading.
11. Click Post at the bottom of the screen.

Incurred (General Ledger)
An Incurred (General Ledger) can be created as follows:
1. Navigate to and open the Matter.
2. Select Disbursement from the Matter Actions menu.

3. Select Incurred General Ledger from the Menu.

4. In the General Ledger Account section, type in an account name or number.

5. Enter a date in the Date section of the screen.

6. Enter a description in the Description field.

7. Start typing a name in the Pay To field to select an entity from the directory. If the supplier does not exist, a purple New symbol will appear to the right of the field.
Note: When adding a new supplier during the processing of a transaction, additional address and payment details will need to be entered on the entity card and the newly created Supplier will be taken through a Supplier Verification process. This process allows Supplier banking information to be reviewed prior to any Payment being made to the supplier.
8. Type in an amount in the Amount section. From the drop-down menu, select the appropriate tax code for both Tax code and Billing Tax Code.

9. Click on Post at the bottom of the screen.

Was this article helpful?
That’s Great!
Thank you for your feedback
Sorry! We couldn't be helpful
Thank you for your feedback
Feedback sent
We appreciate your effort and will try to fix the article